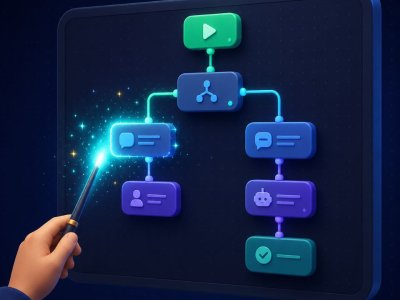
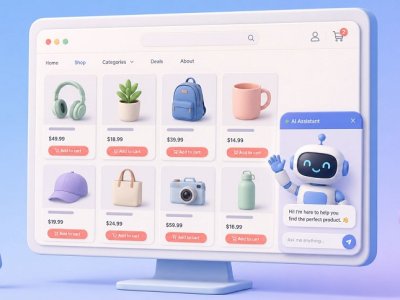
This article walks through how web widgets work, why standard setups lose leads, and how to configure a widget in Botconsole with Telegram handoff, visitor attribution, Knowledge Base search, and prompt optimization.
💡 Read also: AI Chatbot on Company Knowledge: Prices, Services & RAG Without Hallucinations — build reliable AI answers from your prices, services, and company knowledge • 11 mins read
1. What is a web widget?
A web widget is an interface element embedded into a website. It usually appears as a floating button in the corner of the screen that opens a chat window when clicked. It can also sit directly inside a page layout, such as on a pricing or checkout page.
┌─────────────────────────────────────────────────────────────┐
│ Your Website                                                │
│                                                             │
│   ┌──────────────────────────┐                              │
│   │ AI Assistant Widget      │ (Embedded or Floating)       │
│   │ • Real-time streaming    │                              │
│   │ • Knowledge Base (RAG)   │                              │
│   │ • Lead data extraction   │                              │
│   │ • 1-click messenger move │                              │
│   └──────────────────────────┘                              │
│                                           [ Chat Button ]    │
└─────────────────────────────────────────────────────────────┘
Traditional chat compared to AI widgets
| Feature | Legacy Web Widget | AI Web Widget in Botconsole |
|---|---|---|
| Response speed | Minutes or hours, depending on operator availability | Instant replies through streaming text generation |
| Availability | Business hours only, with offline forms at night | Available 24/7 for multi-turn conversations |
| Interaction model | Fixed button trees or static "Leave your email" inputs | Natural dialogue based on the visitor's specific question |
| Data collection | Long forms with high drop-off rates | Structured data collection gathered conversationally |
| Cross-device continuity | Lost when the browser tab closes | One-click transition to Telegram and other messengers |
2. When and why businesses use web widgets
Visitors often arrive on a site with specific questions. If they have to search through documentation, fill out a contact form, or wait for an email reply, many simply leave.
Businesses use web widgets in several common situations:
- Pre-sale questions: Answering questions about product specs, stock availability, shipping options, and warranty terms directly on product pages.
- Lead qualification: Asking about a buyer's timeline, budget, or team size before passing the contact to sales.
- Cart and checkout assistance: Clarifying payment options, return policies, or discount codes right when a visitor is deciding whether to purchase.
- Targeted triggers: Opening the chat automatically based on visitor actions, such as spending 30 seconds on a pricing table, scrolling down 70% of a page, or moving the cursor toward the close button.
- Routine support: Handling repeat inquiries about order tracking, business hours, and account access without requiring human staff for every message.
3. The problem with standard widgets: lost contacts
Most standard website chat widgets rely on an anonymous session in the browser.
  Visitor lands on site ──► Opens chat and asks a question
                                    │
                                    ▼
       Operator takes 2 minutes OR visitor closes the tab
                                    │
                                    ▼
                     SESSION ENDS PERMANENTLY
            • No phone number or social account captured
            • Chat history lost when the tab closes
            • No way to send follow-up messages
Standard widgets run into three recurring issues:
- Tab-close drop-offs: When a visitor asks a question and closes the tab, the connection drops. Push notifications to closed tabs are unreliable and often blocked by browsers.
- Lost conversation history: If a user comes back two days later from a phone or a different browser, the previous conversation is gone. They have to explain their situation again.
- Expensive re-engagement: Bringing back visitors who left without sharing contact details requires paying for retargeting ads.
4. The Botconsole approach: one-click messenger handoff and full context
Botconsole addresses the lost-contact problem by letting site visitors move from the web widget into Telegram with one click, while keeping their full conversation history and attribution data intact.
💡 Read also: One Flow: Telegram + Website Widget — see how to run one synchronized flow across Telegram and your website • 3 mins read
┌───────────────────────────┐         1-Click Telegram Button         ┌───────────────────────────┐
│     Web Widget on Site    │ ──────────────────────────────────────► │    Telegram Conversation  │
│                           │      Personal deep link:                │                           │
│ • Live AI consultation    │      ?start=widget_{guest_id}           │ • Resumes where user left │
│ • UTM and page data read  │                                         │ • AI continues smoothly   │
│ • Country and city logged │                                         │ • Permanent push channel  │
└─────────────┬─────────────┘                                         └─────────────┬─────────────┘
              │                                                                     │
              └──────────────────────────────┬──────────────────────────────────────┘
                                             ▼
                      ┌──────────────────────────────────────────────┐
                      │             Unified Manager Inbox            │
                      │  [Web Widget History]                        │
                      │  ─── User switched to Telegram ───           │
                      │  [Live Telegram Messages]                    │
                      │  Metadata: UTM, Campaign, City, Page URL     │
                      └──────────────────────────────────────────────┘
1. One-click transition to Telegram
Every visitor receives a unique guest identifier (guestId). In the widget header or hub screen, visitors can click Continue in Telegram.
The widget generates a personal deep link:
https://t.me/YourBotName?start=widget_a8f9c0e2-7b3d-4c12-9e8a-1234567890ab
When the visitor opens Telegram, Botconsole automatically links the web session to their Telegram account (master_id).
2. Preserving conversation history with resume mode
When a user moves to Telegram, Botconsole does not reset the conversation or send a generic greeting.
Instead, the AI Dialog block detects the handoff and runs a resume turn. The model receives a system instruction noting that the dialogue moved from the website to Telegram, so it continues answering from where the visitor left off without repeating past greetings. All extracted fields and profile variables remain saved.
3. Unified manager inbox in Chats
Inside the Botconsole Chats section, managers view the entire conversation in a single thread.
A divider (User switched from Web Widget to Telegram) marks where the user moved between channels. Operators can read what the visitor asked the AI on the website, then reply directly to the customer's Telegram account.
┌────────────────────────────────────────────────────────┐
│ Chats / CRM Inbox: Alex (Visitor #4829)               │
├────────────────────────────────────────────────────────┤
│ [14:02 Web] Visitor: Do you support API webhooks?      │
│ [14:02 Web] AI: Yes, webhooks are available on Pro.    │
│ ────────────────────────────────────────────────────── │
│ User switched from Web Widget to Telegram              │
│ ────────────────────────────────────────────────────── │
│ [14:05 TG]  Visitor: How do I upgrade my team?         │
│ [14:06 TG]  Manager: Hi Alex, I can activate that now. │
└────────────────────────────────────────────────────────┘
4. Visitor metadata and first-touch UTM attribution
When a visitor opens the widget, Botconsole logs their context on the user record:
- Location: Country and city through GeoIP, along with interface language.
- Device details: Operating system and browser type.
- Page context: Active page URL and page title (
WIDGET_PAGE_URL,WIDGET_PAGE_TITLE). - First-touch UTM tags:
utm_source,utm_medium,utm_campaign,utm_content, andutm_term.
Even if the visitor navigates across multiple routes in a single-page application (SPA), the first-touch UTM tags stay locked on their profile. Sales reps can see which ad campaign brought the visitor in and which page they were looking at before starting the chat.
5. Catching up on return visits
If a visitor sends a question and closes the tab before the answer arrives, Botconsole checks for unread messages when they return. The launcher button displays an unread count badge (9+) and opens the chat panel so the visitor can read the reply.
5. Creating and configuring a widget in Botconsole
To add a widget in Botconsole:
- Go to Bots -> select your bot -> Settings.
- Click Add connection -> Web Widget.
- Customize the appearance, triggers, and language settings.
- Copy the embed code and paste it into your site.
Customization options
1. Display modes
- Floating: A round button in the bottom corner (left or right) with custom offsets (
offset_x,offset_y), icon choices (chat-bubble,agent,spark,help,gift), and animations (pulse,bounce,shake,ping). - Embedded: An inline chat window placed inside a specific container on your page, using fluid or fixed pixel widths.
2. Visual themes and presets
Choose a base preset and adjust colors and fonts:
telegram_classic: Blue accent with standard rounded corners.minimal_light: High-contrast dark text on white backgrounds.dark: Indigo accent on dark slate backgrounds (#111827).clean_business: Green accent with subtle border radii.warm_creative: Amber tones with rounded cards.
The widget self-hosts its Inter variable font subset. It does not load external Google Fonts, avoiding GDPR compliance problems.
3. Auto-open triggers
Engage visitors based on specific behaviors:
- Delay: Open the chat automatically after a set number of seconds.
- Scroll depth: Open once the visitor scrolls past a target percentage of the page.
- Exit intent: Open when a desktop user moves the cursor toward the top of the browser to leave.
- Return visit: Open for returning visitors on their second or third visit.
4. Pre-chat contact form
You can ask visitors for their name, email, or phone number before they send their first message.
When submitted, Botconsole runs applyContactMatch to check whether that email or phone number belongs to an existing contact, merging the history automatically.
6. Installing the widget on websites and popular CMSs
The widget runs through an 8 KB loader script that mounts inside a Shadow DOM. This keeps your site's CSS styles from altering the widget's layout.
The embed code
Copy the script snippet from your widget connection settings:
<!-- Botconsole Web Widget -->
<script src="https://your-botconsole-domain.com/widget/loader.js?id=YOUR_WIDGET_UUID" async></script>
Installation by platform
┌─────────────────┬──────────────────────────────────────────────────────────┐
│ Platform        │ Where to add the snippet                                 │
├─────────────────┼──────────────────────────────────────────────────────────┤
│ Custom HTML/SPA │ Before the closing </body> tag in your template          │
│ WordPress       │ Theme customizer OR a header and footer script plugin    │
│ Shopify         │ Online Store -> Themes -> Edit Code -> theme.liquid      │
│ Tilda           │ Add a T123 block (HTML) in your header or footer         │
│ Webflow         │ Project Settings -> Custom Code -> Footer Code           │
│ Wix             │ Settings -> Custom Code -> Body - End                    │
└─────────────────┴──────────────────────────────────────────────────────────┘
1. Custom HTML and single-page apps
Paste the script tag directly before the closing </body> tag of your main HTML file.
In single-page applications, you can also control the widget programmatically:
window.BotconsoleWidget = window.BotconsoleWidget || {
  init: function(config) { /* loads automatically */ }
};
2. WordPress
- Install a code snippet plugin such as WPCode.
- Open Code Snippets -> Header & Footer.
- Paste the Botconsole script tag into the Footer box.
- Save the changes.
3. Shopify
- In Shopify Admin, open Online Store -> Themes.
- Click the three dots next to your current theme and choose Edit code.
- In the sidebar, select
Layout->theme.liquid. - Paste the script tag right before the closing
</body>tag. - Save the file.
4. Tilda
- Open the page editor in Tilda.
- Open the block library, go to Other, and select block T123 (HTML code).
- Paste the script tag into the block.
- Publish the website.
7. Connecting conversational AI through the AI Dialog block
To let an AI handle conversations in the widget, add an AI Dialog block on the visual scenario canvas.
       ┌────────────────────────┐
       │   Initial Entry Node   │
       └───────────┬────────────┘
                   │
                   ▼
       ┌─────────────────────────────────────────────────────────┐
       │ AI Dialog Block                                         │
       │                                                         │
       │ • Provider: OpenAI, Claude, Google Gemini, Grok, Kimi   │
       │ • Model: GPT-4o-mini, Claude 3.5 Sonnet, Gemini Flash   │
       │ • System Prompt: Clear role, rules, and goal            │
       │ • Knowledge Base: Connected                             │
       │ • JSON Schema: { name, phone, budget, requirement }     │
       │ • AI Tools: [ search_catalog, check_availability ]      │
       │ • Streaming Mode: Enabled                               │
       └───────────────────────────┬─────────────────────────────┘
                                   │
                   ┌───────────────┴───────────────┐
                   ▼ (When required data collected)▼
       ┌────────────────────────┐      ┌────────────────────────┐
       │ Notify Sales in CRM    │      │ Send Booking Link Node │
       └────────────────────────┘      └────────────────────────┘
Features of the AI Dialog block
- Provider support: Use your own API keys for OpenAI, Anthropic Claude, Google Gemini, Grok, Kimi, or OpenRouter.
- Text streaming: The assistant types out responses token by token so visitors see answers immediately.
- Structured data extraction (JSON Schema): Define the specific fields you need the AI to collect during the conversation:
The model gathers this information throughout the dialogue. When all fields are complete, the node marks{ "lead_name": "string", "company_email": "string", "team_size": "number", "primary_goal": "string" }final_state: trueand passes the values to variables such as{{ai_result.company_email}}. - AI tools: Let the model call bot commands mid-conversation to search product catalogs, calculate quotes, or verify availability.
8. Improving AI response quality and conversion rates
An unguided AI model often gives long answers that fail to guide visitors toward a purchase. Three practices keep answers accurate and focused on conversion.
Connect a knowledge base (RAG)
Do not paste product catalogs, price lists, or large policy manuals directly into the system prompt. Long prompts increase token costs and cause models to miss conversational instructions.
Instead, use Botconsole's built-in Knowledge Base:
 Visitor asks: "Do you offer refunds on annual subscriptions?"
                     │
                     ▼
  ┌───────────────────────────────────────────────────────┐
  │ Knowledge Base Search (RAG)                           │
  │ Found: "Annual plans carry a 14-day refund window"    │
  └──────────────────┬────────────────────────────────────┘
                     │
                     ▼
  ┌───────────────────────────────────────────────────────┐
  │ AI Generates Factual Reply:                           │
  │ "Yes, we offer a 14-day refund window on all          │
  │ annual subscriptions."                                │
  └───────────────────────────────────────────────────────┘
To set it up:
- Open Bot Settings -> Knowledge Base.
- Upload FAQ documents, pricing sheets, or text notes.
- Once the files reach Ready status, open your AI Dialog block and toggle Use bot knowledge base.
- The bot will retrieve relevant passages automatically to answer user questions.
Optimize the system prompt for sales conversations
The system prompt sets the tone, boundaries, and goals for the assistant.
┌────────────────────────────────────────────────────────────────────────┐
│ Sales System Prompt Example                                            │
├────────────────────────────────────────────────────────────────────────┤
│ You are an assistant helping visitors on [Company Name].               │
│                                                                        │
│ Goals:                                                                 │
│ 1. Help visitors find the right plan or product for their needs.       │
│ 2. Answer product and pricing questions using the Knowledge Base.      │
│ 3. Collect the visitor's name, email, and project goals for follow-up. │
│                                                                        │
│ Rules:                                                                 │
│ • Ask one question at a time to keep the conversation manageable.      │
│ • Keep replies short (two to three sentences per message).             │
│ • Maintain a direct, helpful tone.                                     │
│ • If the Knowledge Base lacks an answer, say so clearly and offer to   │
│   connect the user with a human specialist.                            │
│                                                                        │
│ Visitor Context:                                                       │
│ Active page: "{{WIDGET_PAGE_TITLE}}" ({{WIDGET_PAGE_URL}})             │
│ Campaign: "{{WIDGET_UTM_CAMPAIGN}}"                                    │
└────────────────────────────────────────────────────────────────────────┘
Useful guidelines for sales prompts:
- Use widget variables: Insert
{{WIDGET_PAGE_TITLE}}and{{WIDGET_UTM_SOURCE}}into the prompt so the AI knows what page the visitor is reading. - Ask one question at a time: Forcing the model to ask one question per turn keeps conversations easy to answer.
- Set negative constraints: State what the model must not do, such as quoting unlisted discounts or making up delivery schedules.
Use prompt analysis and multi-model benchmark testing
Click the spark icon in the header of the AI Dialog block to open the Prompt Analysis tool.
┌───────────────────────────────────────────────────────────────────────────┐
│ AI Prompt Analysis and Benchmark Runner                                   │
├───────────────────────────────────────────────────────────────────────────┤
│ Quality Score: 94%                                                        │
│ • Clear role definition   • Single-question rule   • Fallback constraint  │
├───────────────────────────────────────────────────────────────────────────┤
│ Test Suite (15 Customer Questions):                                       │
│                                                                           │
│ [ OpenAI: GPT-4o-mini ]     [ Claude 3.5 Sonnet ]     [ Gemini 2.0 Flash ] │
│  Accuracy: 100% (15/15)      Accuracy: 100% (15/15)    Accuracy: 100%     │
│  Time: 18 sec                Time: 29 sec              Time: 12 sec       │
│  Cost: $0.0008               Cost: $0.0094             Cost: $0.0004      │
│                                                        [ Apply to block ] │
└───────────────────────────────────────────────────────────────────────────┘
- Prompt audit: The analyzer reviews your prompt for missing instructions and provides specific suggestions you can apply with one click.
- Question test suites: Create test cases from real customer questions, imported CSVs, or generated site URLs.
- Compare models: Run tests across up to five models at once (such as GPT-4o-mini, Gemini 2.0 Flash, and Claude 3.5 Sonnet).
- Evaluate cost and speed: Compare accuracy, total response time, and token cost side by side, then click Apply to block to select the winning model.
9. Summary and implementation checklist
Setting up an AI web widget in Botconsole involves five main steps:
┌────────────────────────────────────────────────────────────────────────┐
│ Implementation checklist                                               │
├────────────────────────────────────────────────────────────────────────┤
│ [ ] 1. Create a Web Widget connection and pick a matching preset.      │
│ [ ] 2. Configure auto-open triggers (such as a 15-second delay or      │
│        exit intent) to engage visitors at key moments.                 │
│ [ ] 3. Add the loader script before the closing </body> tag.           │
│ [ ] 4. Upload FAQs and product information to the Knowledge Base.      │
│ [ ] 5. Set up an AI Dialog scenario with JSON data capture and test    │
│        prompt accuracy in the benchmark runner.                        │
└────────────────────────────────────────────────────────────────────────┘
Combining instant AI responses with one-click messenger handoff and visitor attribution helps you answer questions quickly and stay connected with leads after they leave your site.


Terms of material usage
Full or partial copying of materials is allowed only with an active and indexed link to the original source: https://botconsole.net/blog/en/26/how-to-set-up-an-ai-web-widget-to-boost-sales-and-retain-leads